Is the previous tutorial Vulnerability Scanning with OpenVAS 9.0 part 1 we’ve gone through the installation process of OpenVAS on Kali Linux and the installation of the virtual appliance. In this tutorial we will learn how to configure and run a vulnerability scan. For demonstration purposes we’ve also installed a virtual machine with Metasploitable 2 which we’ll target with OpenVAS. If you don’t know how to install Metasploitable you can check out the installation tutorial for Metasploitable 2 (scroll down a bit) or Metasploitable 3.
Before we can actually start vulnerability scanning with OpenVAS 9, we have to complete the following tasks:
- Create and configure a target.
- Create and configure a scan task.
- Run the scan.
At this point of the tutorial you need to have OpenVAS 9.0 installed and configured. If you haven’t done this at this point I recommend to follow part 1 of vulnerability scanning with OpenVAS first. To follow along it is also recommended to have a vulnerable Metasploitable machine up and running that is accessible from the OpenVAS appliance or the Kali Linux VM you’ve installed OpenVAS on. The lab setup used for this tutorial looks as follows:
- Host machine with VMWare Workstation Pro 12.
- Kali Linux 2018.2 VM with OpenVAS 9.0 installed (192.168.65.128).
- Metasploitable 2 VM (192.168.65.137).
All virtual machines use the NAT network which can be configured in the network settings on the network adapter. Now that we’ve got everything up and running, let’s start with configuring a target and a scan task.
Tip: Did you forgot to write down or change your OpenVAS admin password? Check out the installation tutorial to find out how to reset the admin password.
Vulnerability Scanning with OpenVAS 9 Tutorials
- Vulnerability Scanning with OpenVAS 9 part 1: Installation & Setup
- Vulnerability Scanning with OpenVAS 9 part 2: Vulnerability Scanning
- Vulnerability Scanning with OpenVAS 9 part 3: Scanning the Network
- Vulnerability Scanning with OpenVAS 9 part 4: Custom scan configurations
1 Creating a target in OpenVAS
The first step is to create and configure a target using the OpenVAS/Greenbone Security Assistant web interface. This newly created target is selected in the following step where we configure a scanning task.
To create a target, we need to follow 2 steps:
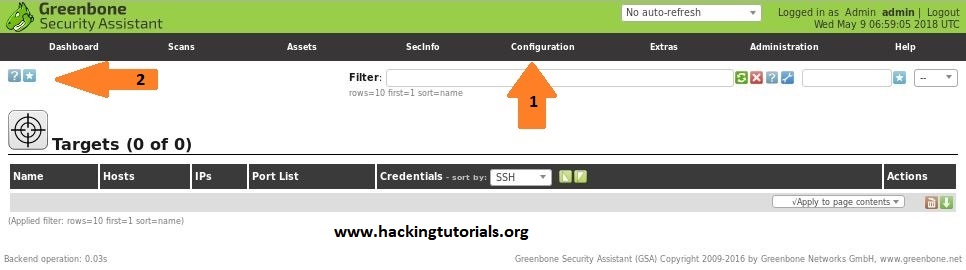
- Go to ‘Configuration’ in the top menu and select ’Targets’.
- Click the blue icon in the top left corner to create a new target.

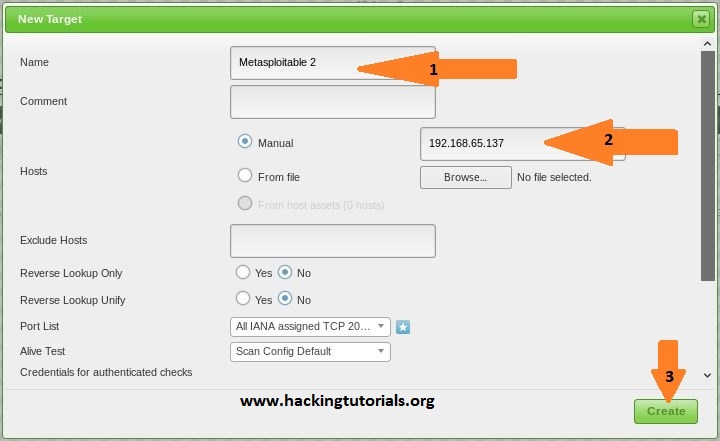
After hitting the new target button, a dialog screen appears where we have to enter the following information:
- Target name, we’ll name it Metasploitable 2.
- The target IP host which is the IP address for our Metasploitable 2 lab machine.
Keep all other settings default and click the ‘Create’ button.

The newly created target will now appear in the list of available targets:

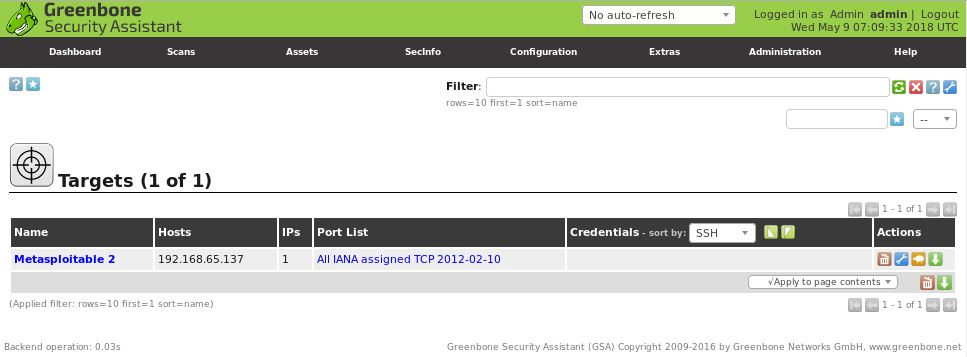
Now that we’ve got our target all set up, let’s continue with creating a scan task that will scan the Metasploitable 2 target for vulnerabilities.
2 Configuring a scanning task in OpenVAS
In this section of the tutorial we will create a new scanning task. A scanning task defines which targets will be scanned and also the scanning options such as a schedule, scanning configuration and concurrently scanned targets and NVTs per host. In this tutorial we will just create a scan task and use default scan configurations. In Vulnerability Scanning with OpenVAS 9.0 part 3 (Will be published on: May 25 2018) we will have a more detailed look into scanning configurations.
To create a new scan task, we have to perform the following steps:
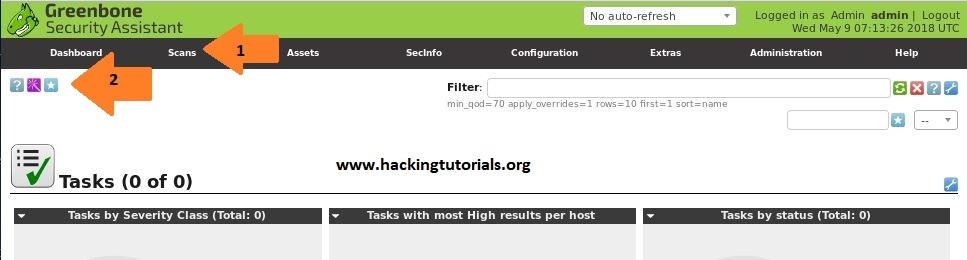
- Go to ‘Scans’ in the top menu and select ’Tasks’.
- Point to the blue icon in the top left corner and select ‘New Task’.

After clicking the new scan option, a dialog screen appears where we have to enter the following information:
- Task name, we’ll name it ‘Scan Metasploitable 2’.
- Make sure that the Metasploitable 2 target we’ve created earlier is selected.
- Tick the schedule once checkbox.
- Keep all other settings default and click the ‘Create’ button to create the new task.


The newly created task will now appear in the task list as follows:


There’s also a few other options to create scan tasks. We can use the scan task wizard to instantly scan a target and also the advanced scan task wizard which gives a few more options to configure. For demonstration purposes we’ll stick with the task we’ve just created.
Now that we’ve configured the scan task and added the Metasploitable 2 machine to the target list, all that remains is to run the task and wait for the results.
3 Running the OpenVAS vulnerability scan
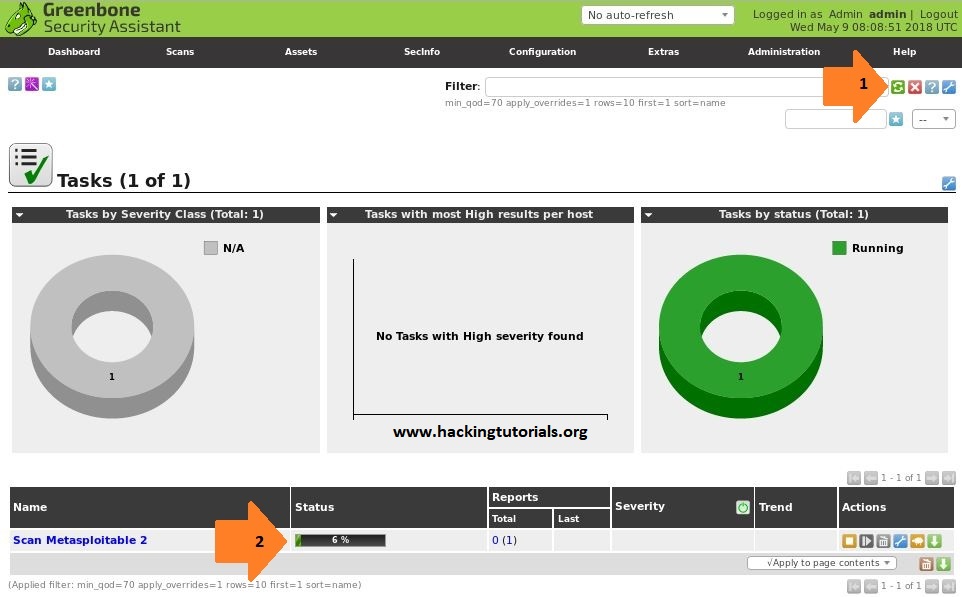
To run the newly created task we just have to click the green start button as follows:

The scan task will now execute against the selected target. Please note that full scan may take a while to complete. When you refresh the tasks page you will be able to check the progress for the executed task:
- Reload the page.
- Check task status/progress.

After waiting a while the scan task is finished and the status changes to ‘Done’:

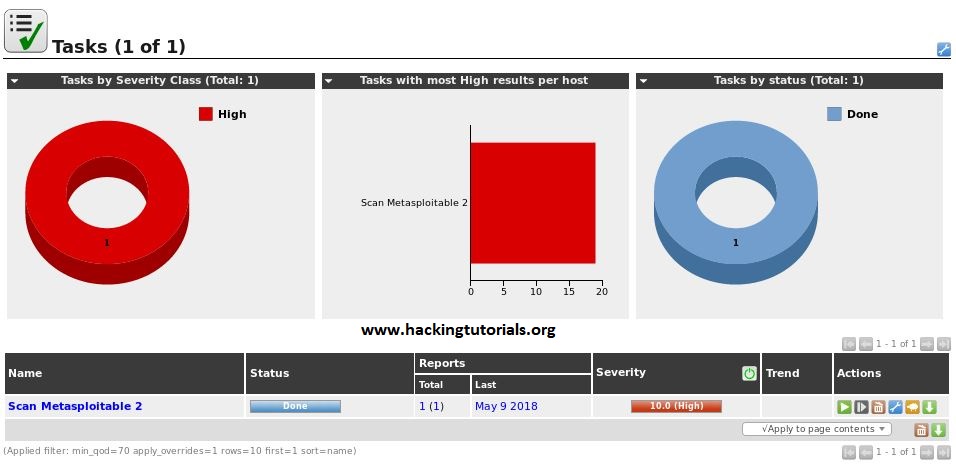
As expected we can see that OpenVAS found a number of severe vulnerabilities. Let’s have a look at the details of the results.
4 Interpreting the scan results
Now that the vulnerability scan is finished we can browse to ‘Scans -> Reports’ in the top menu. On the reports page we can find the report for the completed scanning task:

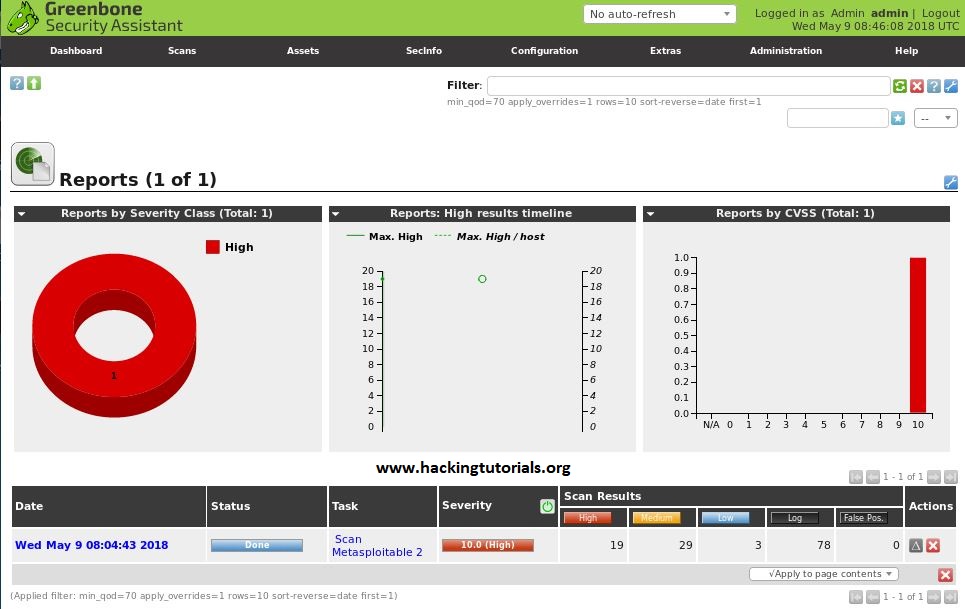
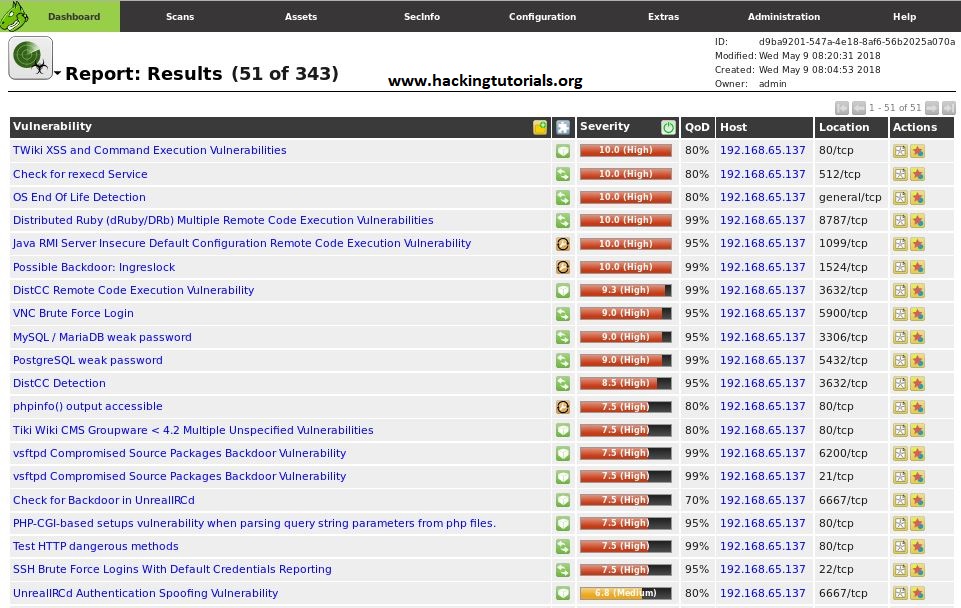
By clicking the report name we can get an overview of all discovered vulnerabilities on the Metasploitable 2 machine, which is a lot as already expected. The results are ordered on severity rate by default:

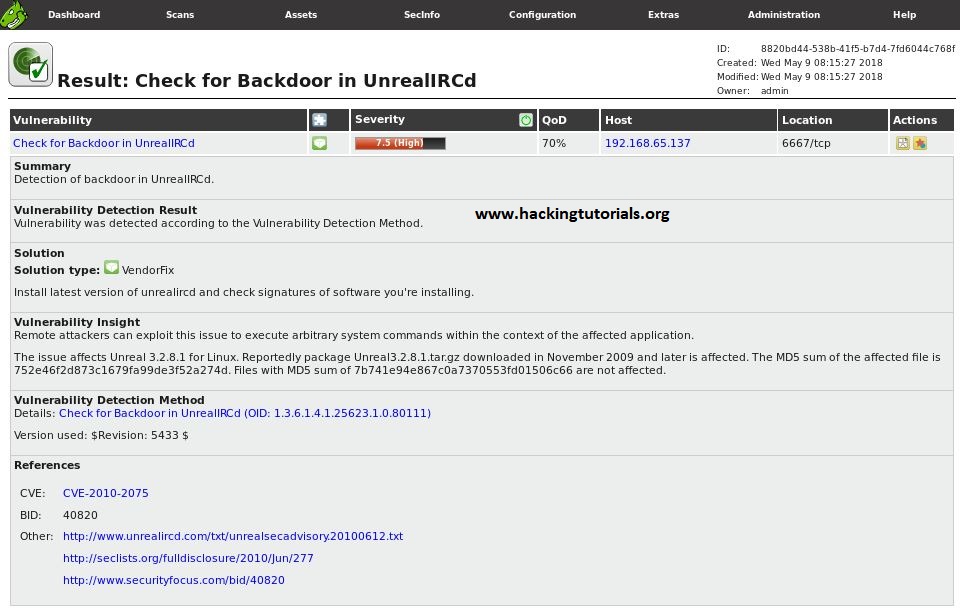
When we click on the vulnerability name we can get an overview of the details regarding the vulnerability. The following details apply to a backdoor vulnerability in Unreal IRCD we’ve covered in an earlier tutorial:

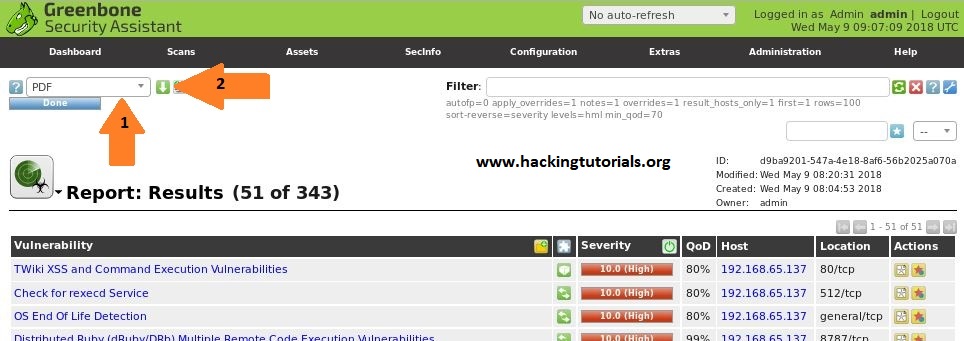
Finally, we can also export the report in a variety of formats, such as: XML, HTML and PDF. WE can do this by selecting the desired format from the drop-down menu and click the green export icon as follows:

For now, this will conclude part 2 of the vulnerability scanning with OpenVAS tutorial. In the next and final part, we will be focusing on custom scanning configurations to fine tune our scanning needs. Part 3 of vulnerability scanning with OpenVAS will be published on May 25.


Hacking Courses on Udemy
Bug Bounty – An Advanced Guide to Finding Good Bugs
Real World Bug Bounty Techniques


Website Hacking / Penetration Testing & Bug Bounty Hunting
Become a bug bounty hunter! Hack websites & web applications like black hat hackers and secure them like experts.


9 Comments
Great tutorial thanks!
But where is part 3, “In the next and final part, we will be focusing on custom scanning configurations to fine tune our scanning needs.” ?
Great to hear that you liked the tutorial!
Part 3 is scheduled to be published in about 2 weeks.
Good tutorials guys, I await part 3 as I am putting together a master-slave config and wanted to see if you touched upon that. Any update to the release date available?
Hi,
Thanks! I’m working on part 3 now which will be published next week.
Best regards,
Hacking Tutorials
That’s good to hear, well I successfully deployed remote scanning architecture with OpenVAS 9 using OMP slave config. I’ll check back next week anyways since the other tutorials were so good. Let me know if you want some input for remote features.
Sounds good! What remote features would you recommend to cover in the next tutorial?
Nice work with part No. 1 and Part No. 2 looking fordward to read part No. 3
Thank you! Working on it.
There is any way to access to command line in the Openvas Virtual appliance version