For all scans so far, we’ve only used the default scan configurations such as host discovery, system discovery and Full & fast. But what if we don’t want to run all NVTs on a given target (list) and only test for a few specific vulnerabilities? In this case we can create our own custom scan configuration and select only the NVTs that we want to test for. Please note that this is totally optional and I’d recommend against creating your own scanning configurations in most cases. The ‘Full and Fast’ and the ‘Full and Fast Ultimate’ are both fast and intelligent. These types of scans do not test SMB vulnerabilities on FTP ports while slow scans might test every single NVT on every single port. In the next section we will create a custom scan configuration that will only test for vulnerabilities present on printer devices.
Vulnerability Scanning with OpenVAS 9 – Tutorials
Vulnerability Scanning with OpenVAS 9 part 1: Installation & Setup
Vulnerability Scanning with OpenVAS 9 part 2: Vulnerability Scanning
Vulnerability Scanning with OpenVAS 9 part 3: Scanning the Network
Vulnerability Scanning with OpenVAS 9 part 4: Custom scan configurations
Custom scan configuration for printers
In this section we will create a custom scanning configuration to test enterprise printers and multifunctional (MFP) for vulnerabilities. The reason we’re going to create a custom scan configuration is that printers are commonly overlooked targets when it comes to security and vulnerabilities. Successfully exploiting vulnerabilities on these devices cannot only allow an attacker to get access to sensitive data but also to gain a beachhead on the network. Many enterprise printers also authenticate against the company’s domain controller using Lightweight Directory Access Protocol (LDAP). In most cases it is unlikely that devices authenticate with an administrator account but it might provide attackers with access to a domain account.
When targeting printers, it is important to optimize the scanning configuration as much as possible and only scan for NVTs that target printers. Many printers have a fragile network stack and cannot handle large scanning loads which might even crash the target. We will exclude NVTs that don’t have anything to do with printers such as NVTs targeting equipment from specific manufacturers or NVTs that target local vulnerabilities.
Creating the custom scan config
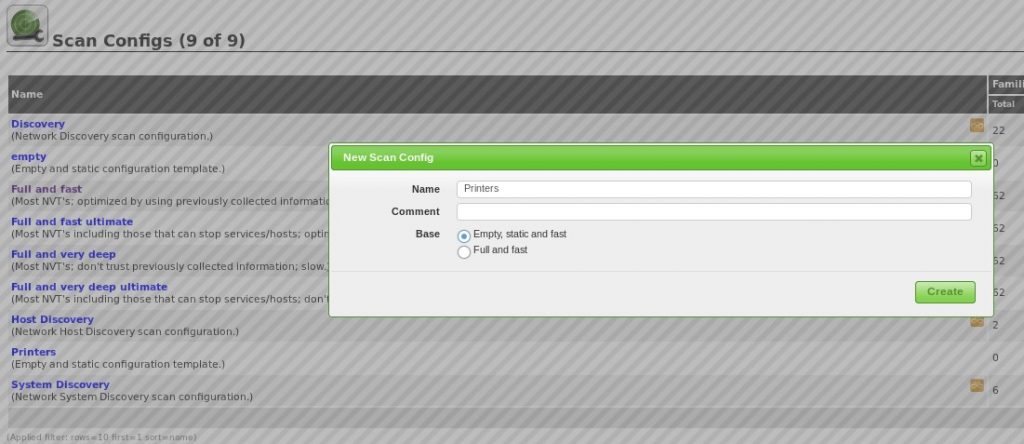
First, we will create a new scan config and name it ‘Printer’. We can choose to copy an existing scan config and disable NVTs that we do not want to use but as we’re targeting printers here, it’s better to start with an empty scan config and enable the few NVTs that apply to printer devices.

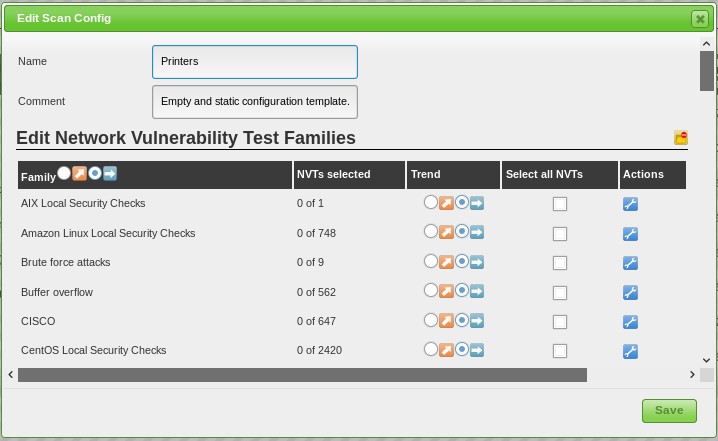
Next we can edit the scan config to locate NVTs:

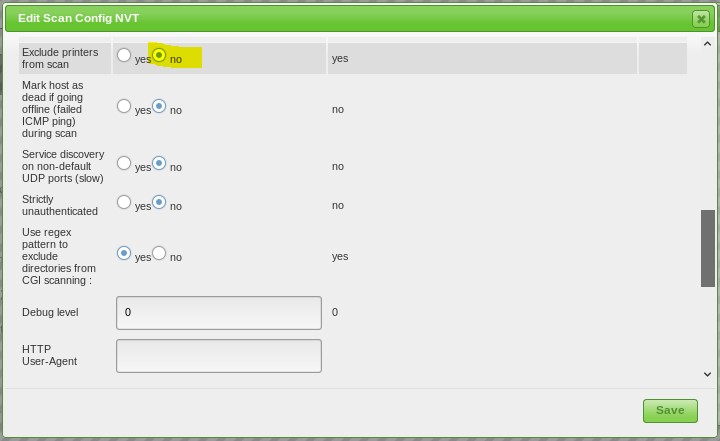
Scroll down to the global variable setting: Exclude printers from scan and click the ‘edit’ icon:
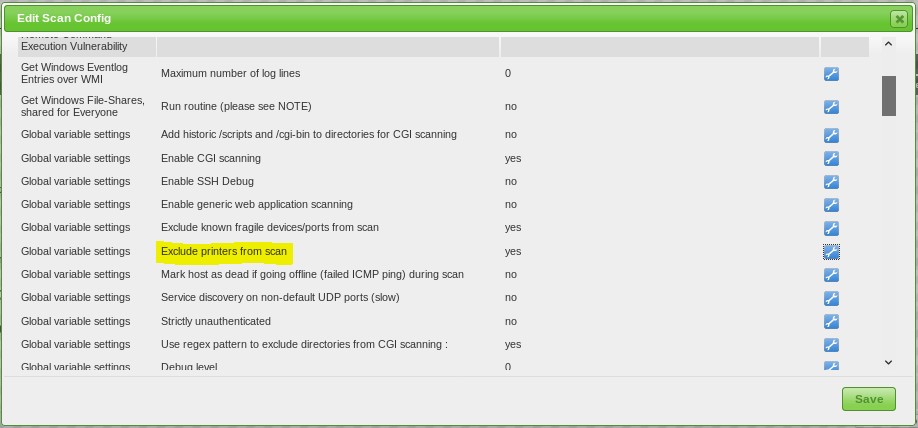

Enable ‘Exclude printers from scan’:

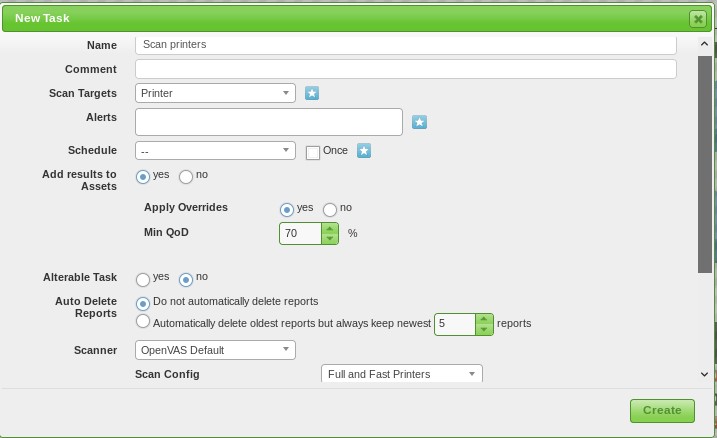
Next, we create a new scan task and select the printers target list as target and the newly created scan config ‘Printers’ (The screenshot below displays ‘Full and Fast Printers‘, make sure to select the newly created scan config here):

Tip 1: When you’ve selected single NVTs do not click the NVT family checkbox as this will add all NVTs from the specific family.
Tip 2: In this demonstration we’ve only added NVTs that specifically target printers. As most modern printers run different a lot of different services and servers, it is recommended to also enable NVTs that target FTP, Telnet, SSH, SNMP and web servers.
Tip 3: Generally, I’d recommend against the route of selecting individual NVTs unless it’s just a handful of NVTs as for printers.
From here you can simply run a scan and select the newly created scan configuration.


8 Comments
Will we have part 5 ?
What would you like to see in part 5?
any more tricks ?
I’d LOVE to see a part 5 where Metasploit is fed the results of the scans automatically to test them.
Thank you for the past tutorials, they where enlightening. There are some inconsistencies with this tutorial though. In the section ‘Creating the custom scan config’ you mention to call the scan config ‘Printer’ and make it an empty scan config but later in that section you state:
“Next, we create a new scan task and select the printers target list as target and the newly created scan config ‘Full and Fast Printers’:”
I believe you should change the beginning of the section to state the latter name and state to select ‘Full and Fast’ as the base.
Hi, Thank you for your feedback and great to hear that you liked the tutorial!
You’re right, the scan configuration to select should be the one that was created earlier in the tutorial (Printers), i have updated this.
To exclude printers, the family is ‘Settings’ and the config NVT is ‘Global variable setting’.
So we’re running OpenVas. Manually scanning once a moth. Want to schedule for once a week automated, but don’t have the feature. Where is it?